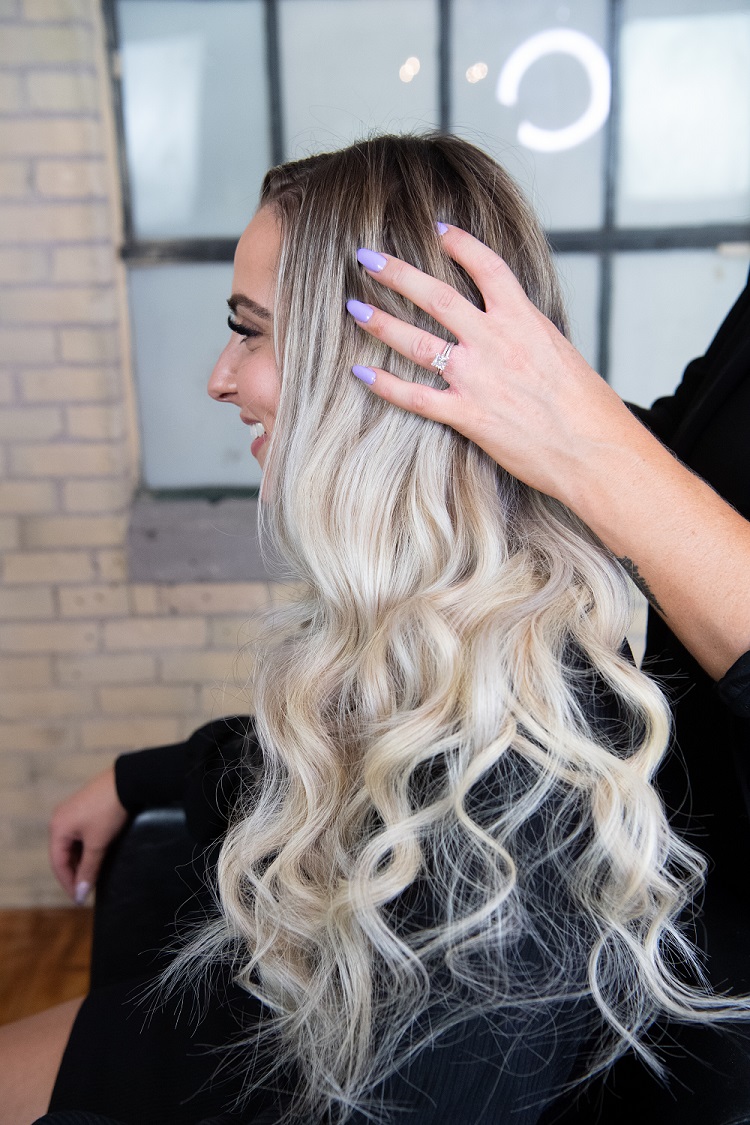
8 Steps to a Great Nano Touch up Appointment
Posted by Hair Flair on 1st Nov 2017
One of the most important aspects of being a great hair extension technician is performing a great maintenance appointment for your clients. We are going to review the steps that you should be covering during every touch up nano link appointment.
Step 1: Review the install with your client

Make sure your clients are coming in at least every 8-10 weeks for a touch up appointment. Now that your client has worn their extensions for a period of time when they come back for a maintenance appointment you should ask them how the extension have been, if they are happy with the way they were installed and if they want anything changed this time. They may want to add more hair, take some out, or have the extensions placed higher or lower than they were before.
Step 2: Removal
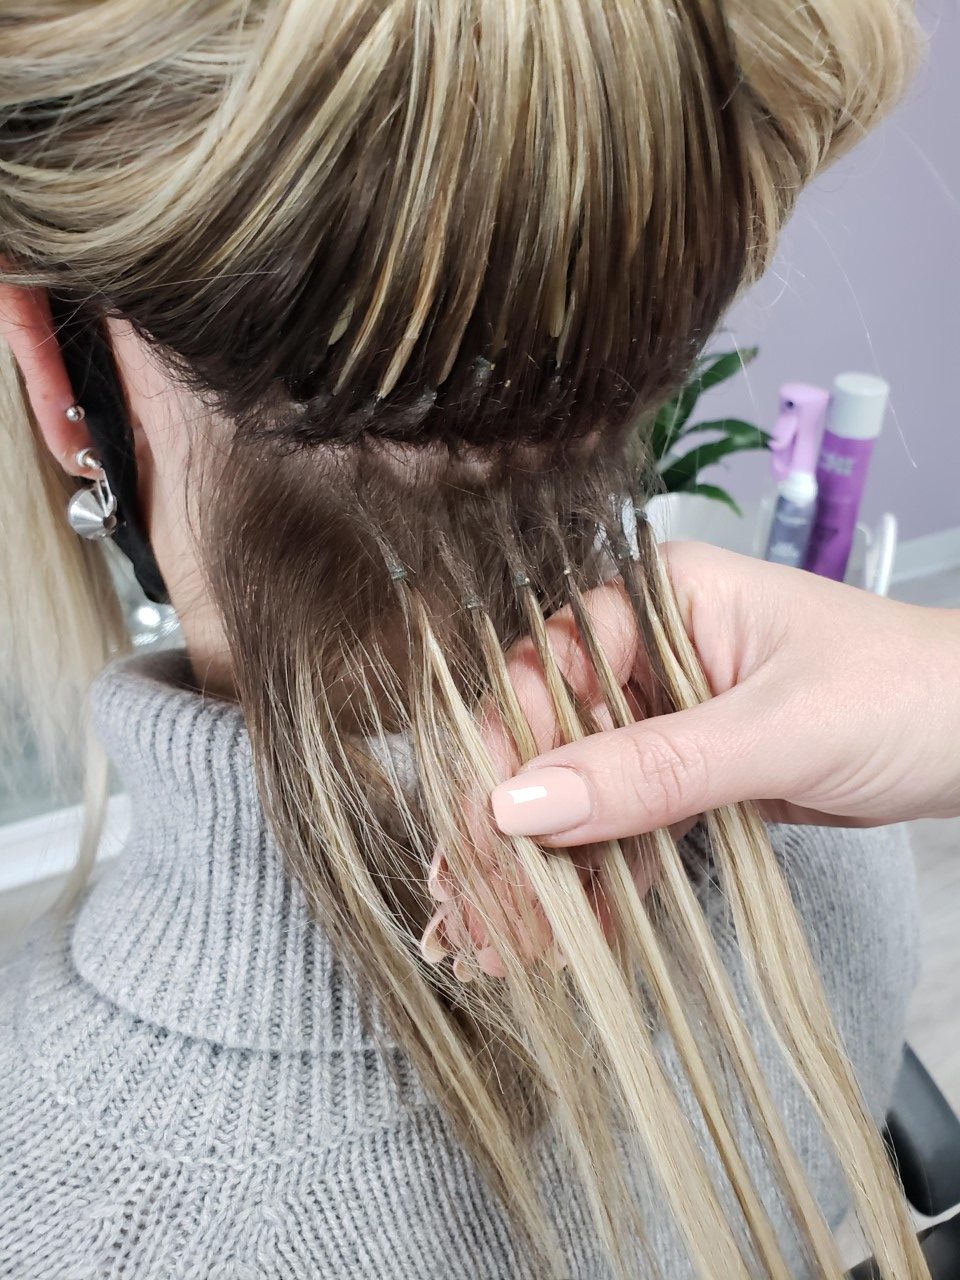
You will need to remove the nano extensions to perform maintenance. If the hair is not cut or layered you can remove all the extensions at once then reinstall them. However, if the client has their extensions cut or layered you will want to remove the extensions in sections, or row by row, to preserve the cut. Removing and reinstalling row by row is usually the fastest way to perform a maintenance.
Step 3: Brushout
Use a soft bristle brush to give the clients hair a brush out. Even if there is tangling using a bristle brush first will loosen some of the knots before going in with a fine tooth comb. You can also use just your fingers to pull apart any matting.
Step 4. De-tangling
Some clients will have no tangling or matting while others may have a lot (especially if it has been awhile since their last touch up). If there is a considerable amount of tangling you will need to remove all the hair extensions to give their hair a good brush out. If your client has a sensitive scalp or you feel that the brushing out is causing them pain it’s a good idea to give them a brush and let them brush their hair out.
Whenever detangling a clients hair make sure you are not pulling on their hair and scalp to hard. The best thing to do is tightly hold above the knot with your fingers and brush out the tangle below. That way when your detangling they cant feel their hair being pulled.
You will also want to tell your client to let speak up if its hurting too much. If it is, be gentler and move to a new area to detangle so that you can give the scalp a break in the area that is hurting.
If you feel like you cannot detangle the hair without causing the client significant pain it is best to let them go home and wash and detangle themselves in the shower with a lot of conditioner, oil and a wide tooth comb and have them come back on a different day to have the extensions reinstalled.
Step 5: Inspect the hair extensions
You will want to pay attention to the extension bonds to see if they need retipping or resealing. If the extension bonds are breaking down you will need to retip and reseal the bonds before reinstalling the hair. If you skip this step the bonds will breakdown quicker and your client will experience excessive shedding. If you notice your clients bonds are breaking down quicker than normal make sure to review after proper care with them.
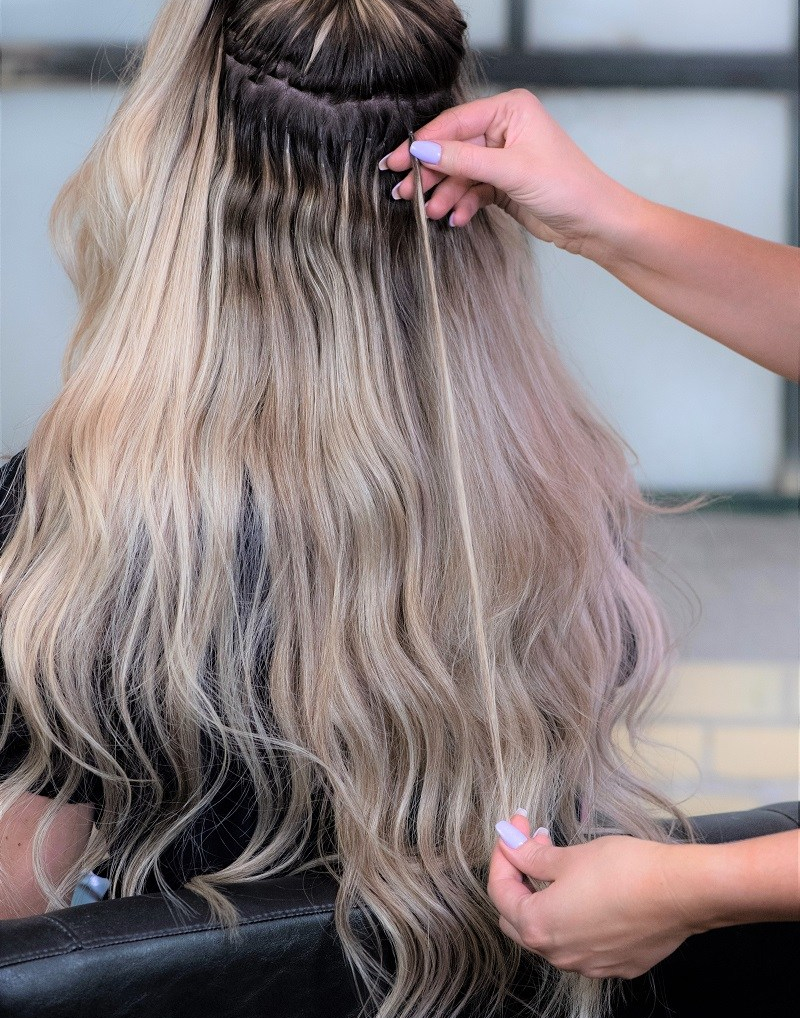
Step 6: Reinstall the hair extensions
Remember to use proper sectioning and install in a similar pattern that you did before (unless the client has asked you to change it). You can reinstall row by row, one at a time or remove all the extensions and then reinstall
Step 7: Check the cut and style of the reinstalled hair
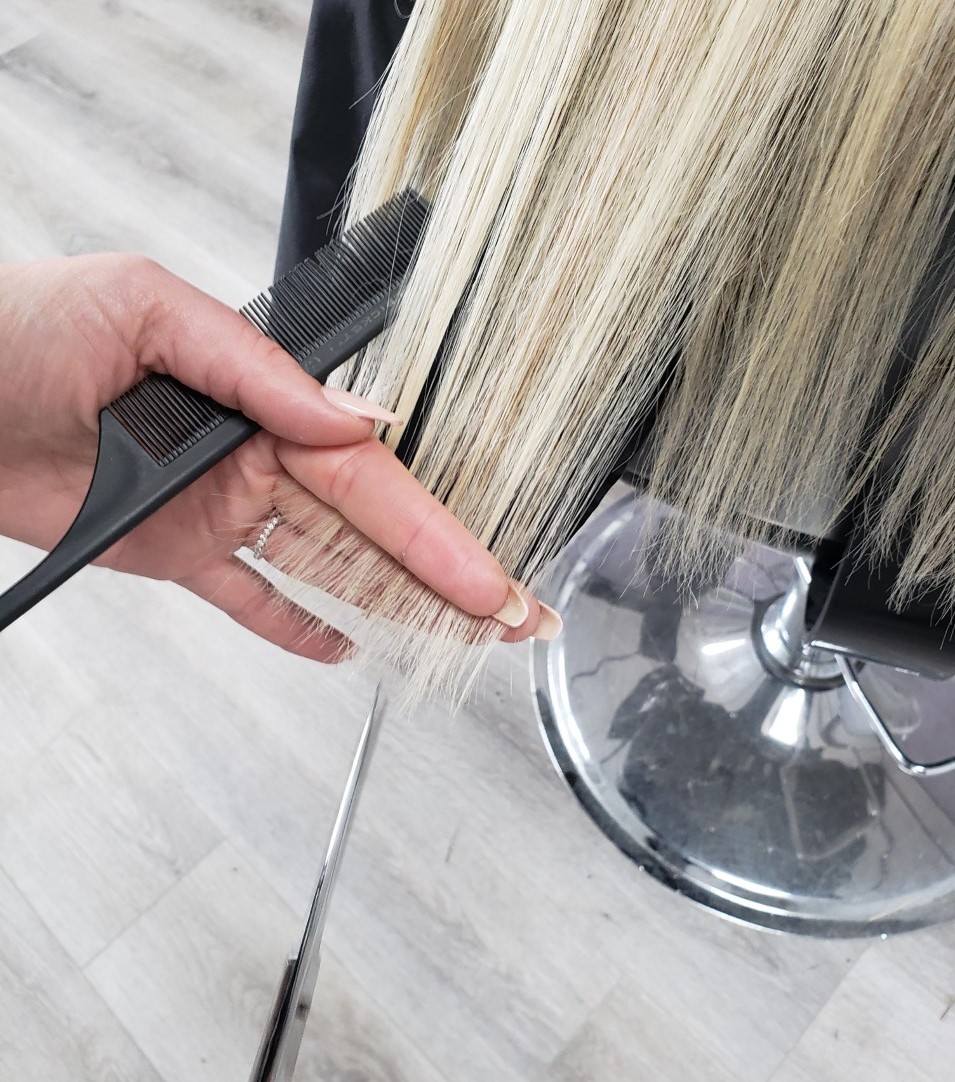
You will want to check that the ends of the extensions are all even. Watch out for individual strands that are sticking out way further than other strands. You may need to trim these pieces. Check the sides of the style (around the face) to make sure the hair is even on both sides and re-layer any pieces that need it.
Also look for pieces that are thick and blunt cut and not blending with the style. You will want to razor these so the ends aren’t so harsh looking
Step 8: The finish

Always finish off by styling the extensions, Ask your client if they would prefer it straight or curled. You want your client to feel like their extensions are new again and for them to leave a touch u appointment feeling great.