How to Perm Hair Extensions
Posted by Hair Flair on 30th Oct 2016
In this article we are going to cover how to perm Hair Flair extensions. It is critically important that you only perm hair extensions that are very high quality! Perming low quality extensions will destroy the hair, leaving it dry, frizzy and unmanageable.
This is a great testament to the high quality that Hair Flair's premium extensions offers stylists: not only can you colour our hair, but it can be safely permed without compromising its integrity!
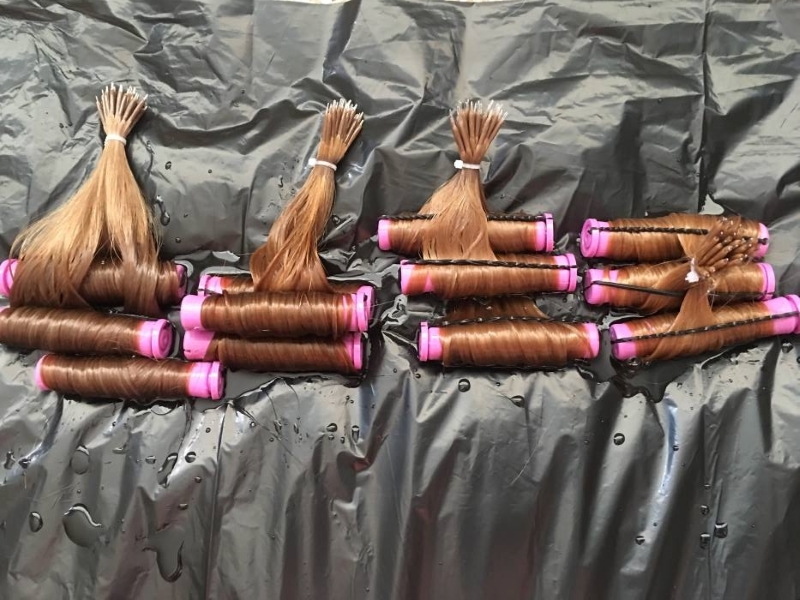
One of our naturally curly clients wanted the occasional option of air drying her hair. Her hair is quite curly, so we chose to wrap her extensions in a purple rod and we used an ISO perm solution in Number 1.
To start, ensure that the bundles are totally saturated with water. You want the hair to be wet when wrapping the perm rods.
We used 3-4 rods per bundle (25 pieces).

Saturate each rod with the waving solution, using about 2 strokes per rod.
Avoid getting the solution on the bonds of the extensions.
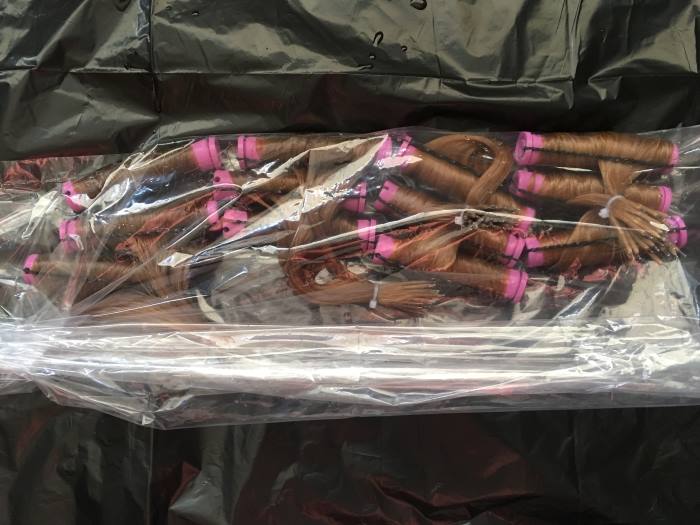
Bag the extensions and allow them to process.
Follow processing time as directed. This particular perm took 20 minutes.

After processing, rinse the rods with hot water. DO NOT REMOVE THE RODS!
Lay the rods on a dry clean towel and blot the extensions with paper towel until all of the moisture is removed.
Follow up with the neutralizer solution. This is going to seal the cuticle and allow it to form to the size and curl of the rod.
Allow the solution to process as directed. This particular solution was 5 minutes.
After you have allowed the neutralizer to process you can remove the rods and perm papers.
You can then rinse and shampoo gently. Using a professional sulfate-free shampoo and conditioner is always recommended.
Allow the hair to air dry or use the diffuser attachment on your blow dryer.


Even with a perm, you still have the option to blow dry straight or chose a styling tool of your choice.

